Moving into a new apartment almost always involves a mountain of corrugated cardboard, a floor scattered with plastic hardware bags, and the unmistakable outline of flat-pack furniture waiting to be assembled. Ready-to-assemble pieces have become the default furnishing strategy for renters. They are economical, fit through narrow stairwells, and ship directly to your doorstep. Yet, the process of putting them together remains one of the most universally dreaded domestic chores.
Much of that frustration does not stem from poor instructions or defective materials. It comes from relying on the disposable tools packed inside the box. Manufacturers include stamped wire Allen wrenches and stamped-sheet metal spanners designed solely to meet the bare minimum definition of a tool. Using them leads to bruised knuckles, stripped screw heads, wobbly joints, and hours of unnecessary agony. Building a compact, deliberate assembly kit costs very little, takes up minimal closet space, and transforms flimsy flat-pack builds into sturdy, permanent furniture that will survive your next lease renewal.
The Problem with the Hardware Bag
Flat-pack furniture relies on engineered wood composites, predominantly medium-density fiberboard and laminated particleboard. These materials provide smooth surfaces and predictable dimensions, but they lack the fibrous structural forgiveness of solid hardwood. The fasteners used in these kits—steel connecting bolts, cam lock pins, and wooden dowels—require precise alignment and controlled torque to seat properly.
The tiny, two-inch L-keys supplied by manufacturers give you virtually no ergonomic leverage. To turn a bolt into an unthreaded pilot hole, you must pinch the thin metal with your fingertips, creating uneven pressure that tilts the fastener off-axis. Once a screw enters particleboard at an angle, it tears through the soft inner core, stripping the hole and permanently weakening the joint.
Furthermore, the cheap metal alloys used in disposable tools deform under moderate strain. A rounded-off hex key will spin uselessly inside a bolt head, leaving you with a half-sunken fastener that you can neither drive forward nor back out. Upgrading to real hand tools prevents this mechanical failure before it starts.
The Core Fastening Kit: Upgrading Your Drivers
Fastening hardware makes up roughly eighty percent of any furniture build. Having the right interface between your hand and the fastener is the single most important factor in a clean assembly.
A Quality Ratcheting Screwdriver with Pozidriv Bits
A standard hardware-store screwdriver will get you through a few screws, but an ergonomic ratcheting multi-bit driver makes the process effortless. The ratcheting mechanism allows you to maintain continuous downward pressure while rotating your wrist back and forth, keeping the bit locked securely in the fastener head and preventing slips that gouge laminated finishes.
More importantly, a multi-bit driver allows you to select the correct bit geometry. One of the most common mistakes in assembling European flat-pack furniture is using a standard Phillips screwdriver on Pozidriv fasteners. While they look nearly identical at a glance, Pozidriv screws feature four additional subtle radial ribs between the main cross-slots, and the walls of the slots are parallel rather than tapered.
Using a traditional Phillips driver on a Pozidriv screw causes the bit to ride up and slip under torque—a phenomenon known as cam-out. This immediately strips the screw head. Equipping your driver with true PZ1 and PZ2 bits, alongside standard slotted and Phillips options, ensures a slip-free connection that drives fasteners flush without chewing up the metal.
Long-Arm Ball-End Hex Keys
While an upgraded screwdriver handles the face fasteners, deep assembly bolts almost always use internal hex sockets. Replace the frustrating L-shaped wire from the box with a proper set of metric ball-end hex keys.
The primary advantage of a ball-end wrench is access. Flat-pack designs often place structural bolts inside tight interior recesses, underneath shelf lips, or behind drawer runners where a standard wrench cannot turn without hitting an adjacent panel. A ball-end profile allows you to engage the bolt at an angle of up to twenty-five degrees, letting you spin fasteners into place even when your line of sight is obstructed. Choose a set with textured rubber sleeves or broad T-handles to give your palm comfortable, broad leverage that eliminates hand fatigue.
Mechanical Control: When to Use Power
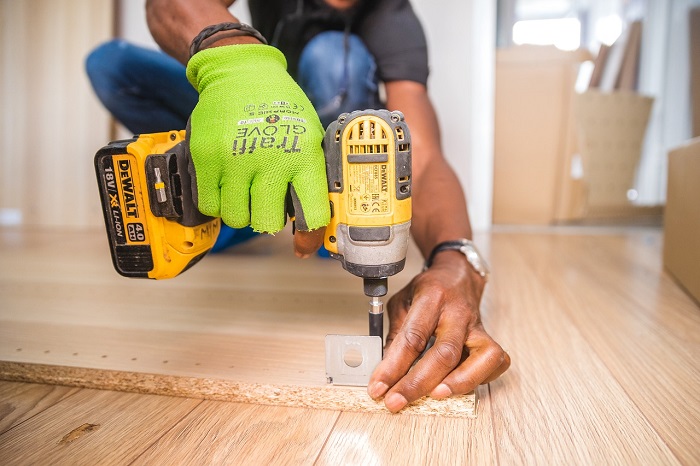
The temptation to grab a cordless drill and blast through eighty shelf screws is understandable, but power tools are the leading cause of ruined flat-pack furniture. Commercial cordless drills and heavy-duty impact drivers deliver immense rotational force. In soft particleboard, a fraction of a second of over-torquing will strip the pilot hole clean, turn the wood core into loose sawdust, or crack the outer melamine veneer.
If you choose to use power, use a compact 4-volt or 12-volt cordless electric screwdriver with an adjustable mechanical clutch.
The clutch is your safety net. Set it to the lowest resistance setting (typically 1 or 2) when driving fasteners into engineered wood. The moment the screw head meets the surface of the board, the clutch slips with a gentle click, disengaging the motor before the threads can tear the hole out. You can then finish the final quarter-turn by hand with a manual screwdriver to feel the exact point of solid resistance.
Percussion and Alignment: Beyond the Fasteners
Flat-pack structural integrity relies heavily on wooden fluted dowels that align panels and absorb shear weight. How you drive these dowels into place dictates how square the finished unit will be.
The Non-Marring Dual-Head Mallet
Never use a traditional steel claw hammer directly on flat-pack components. A single glancing blow from a steel head will dent laminated edge banding, shatter fragile particleboard cores, or split wooden dowels down the center.
A lightweight rubber or polyurethane mallet delivers firm, distributed kinetic force without marring delicate finishes. Use it to tap dowels firmly into the bottom of their pre-drilled sockets before joining panels, and use the soft rubber face to gently tap stubborn side panels flush against horizontal shelves. If you must use a standard hammer in an emergency, always place a scrap block of softwood or a folded piece of thick cardboard between the hammer face and the furniture panel to absorb the shock.
A Magnetic Torpedo Level and Tape Measure
A bookcase or dresser that is out of square will cause drawers to stick, doors to hang unevenly, and the entire unit to rock on the floor.
Use a simple tape measure to perform a diagonal squareness check before tacking the thin backer board into place. Measure from the top-left corner to the bottom-right corner, then from the top-right to the bottom-left. If the two diagonal measurements are identical, your cabinet is perfectly square. Fastening the rear fiberboard panel while the frame is verified square locks the geometry in place permanently.
Once the piece is upright in your apartment, place a compact nine-inch torpedo level across the top. Rental apartment floors are notoriously uneven, particularly near baseboards. Use the level to adjust the unit’s leveling feet—or slide thin composite shims underneath the base—so the furniture rests completely stable without putting continuous twisting strain on its internal joints.
Small Workflow Essentials That Save Rental Deposits
A few inexpensive organizational items will keep your security deposit intact and prevent assembly chaos from overtaking your living space.
-
A magnetic hardware tray: Flat-pack builds include dozens of miniature dowels, pins, shelf pegs, and cam locks. Tossing them onto the carpet guarantees that small pieces will roll under radiators or get swallowed by rug fibers. A shallow magnetic parts tray keeps all metal hardware contained and instantly visible.
-
Painter’s tape: Blue painter’s tape is exceptionally useful during assembly. Use it to temporarily hold heavy vertical dividers in place while you thread the opposing side bolts, label identical-looking wooden panels during unboxing, or wrap a piece around a drill bit as a depth gauge if you ever need to clear out an undersized pilot hole.
-
A sharp utility knife: Instead of ripping open shipping boxes with brute force—which risks scratching the finished wood panels resting directly beneath the cardboard seam—use a utility knife with the blade extended only a fraction of an inch to slice through packaging tape cleanly. Flatten the empty cardboard boxes and lay them across your floor to serve as a cushioned, scratch-free assembly mat that protects both your new furniture and your landlord’s hardwood flooring.
Assembling furniture does not have to be an exhausting weekend trial. By stepping away from the disposable tools packed in the box and relying on a few purpose-built, ergonomic essentials, you protect your materials, save your hands, and assemble reliable furniture that stays solid for years to come.