Thinking about a seamless, spa‑calm bathroom that’s durable, waterproof and easy to keep pristine? This ultimate guide to microcement will walk you through everything from planning the zones you’ll coat and choosing finishes, to preparing substrates, waterproofing correctly, and applying each layer for showers, floors and walls with professional results. You’ll find practical design pointers on colour, texture and anti‑slip performance, clear UK‑based costs and timelines to help you budget and hire with confidence, plus straightforward care routines and quick fixes to keep surfaces looking their best. Whether you’re updating a compact flat or remodelling a family bathroom with underfloor heating and pets in mind, you’ll get step‑by‑step clarity, concise tables for quick reference, and real‑world examples—so feel free to share your plans, questions and experiences as you read.
Planning Your Microcement Bathroom: Suitability, Style and Scope
Get specific about what you’re covering: map out the shower enclosure, any splash zones, the bathroom floor and the vanity. You’re choosing microcement because the seamless finish kills grout lines, the low thickness (≈2–3 mm) slides over existing tiles, and the retrofit-friendly system saves demolition stress. Now be honest about constraints: check ventilation (steam is relentless), confirm underfloor heating compatibility, plan movement joints over live substrates, and think about family use and pets—claws, puddles and shampoo spills all happen. Follow this tight plan: 1) Confirm surfaces—tile, cement board or plaster—plus moisture levels. 2) Choose finish feel (matte or satin), anti-slip needs and colour direction. 3) Decide edges and junctions: minimalist trims or wrapped returns for that sculpted look. 4) Set your tolerance for visible variation—it’s hand-applied, a little movement is the point. 5) Lock a realistic schedule: 4–7 days install plus cure time before heavy use. Example to copy: Small flat, 1.8 m × 0.9 m shower + 3 m² floor: go satin, warm grey, wrapped niche edges, and a 5‑day install—clean, modern, no drama.
Use-case matrix you can actually act on:
Area — Recommended build-up — Notes
Shower walls — Primer + membrane + base + 2 coats microcement + sealer — zero grout lines; add anti-slip aggregate in final coat.
Bathroom floor — Decoupling mat if needed + base + microcement + sealer — plays nice with UFH; keep build ≤ 3 mm.
Vanity/splashback — Base + microcement + sealer — avoid damage from sharp edges.
Bottom line: if you want a tough, waterproofed, easy-clean bathroom that looks tailored, this setup is hard to beat. The seamless microcement system delivers style without ripping out your space, and the smart choices above keep it durable, safe and future‑proof.
Substrate Prep and Waterproofing for Microcement Wet Areas
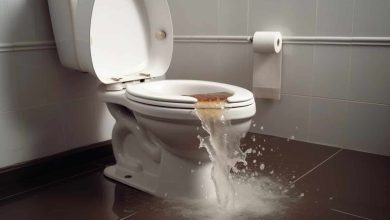
You want a bathroom that looks razor-sharp and actually lasts? It starts with the base. Keep it brutal and honest: make the substrate sound, flat, and watertight—nothing else. Strip back the nonsense: remove loose coatings, degrease tiles, and key glossy surfaces so primers can bite. Don’t guess the moisture—measure it: screeds at ≤75% RH, timber at ≤15% MC, otherwise you’re building a spa for mould. Lock down movement: use structural-grade ply where appropriate and cement backer boards in showers. Cracks? Treat them like a liability—epoxy + mesh for static cracks and honour active joints instead of bridging them. In showers, shape reality with falls to the drain at 1:60–1:80 so water goes where it should. Then go all-in on tanking: hit corners, niches, and around valves, reinforcing with tape or fleece so the membrane has muscle. Finish prep by priming per the manufacturer for the exact substrate—no improvisation. Tiny callout: Do—check compatibility of primer, membrane, and microcement system. Don’t—rely on microcement for waterproofing. Case study: Existing tiled shower—deep clean, abrasive key, epoxy prime, apply full tanking with fibre tape on all corners, then re-prime ready for microcement. This sequence is the difference between a showroom finish and a comeback job.
Two quick sanity checks before you even open a bag of anything: the surface must be dimensionally stable and uniformly absorbent after priming. If the substrate flexes, your finish will crack. If the absorbency varies, your coats will flash and telegraph every flaw. Keep the process clinical and repeatable, and your microcement bathroom will be warmth-resistant, moisture-controlled, and built for impact. It’s not glamorous, but this is where bathrooms that actually survive get made.
How to Apply Microcement: Showers, Floors and Walls Step by Step
Mask edges, drains and fittings with high-tack tape and film, then set a clean working order: ceilings to walls to floors, wet areas last. Maintain 15–25°C, RH <70%, and keep windows cracked for ventilation—no heaters blasting at the surface, no forced drying. 1) Mask precisely around shower trays, niches, trims and sanitaryware; cap drains so nothing drops in. 2) Pull a base/levelling coat where called for, 0.5–1.0 mm, just enough to kill highs; sand lightly when dry. 3) Lay the first microcement coat whisper-thin and continuous (0.5–0.8 mm), working wet-on-wet edges to dodge lap lines—let it dry fully. 4) Trowel the second microcement coat tighter (0.3–0.7 mm), refine your movement for a consistent flow, then denib and vacuum. 5) For feature walls, add an optional micro-fine coat to dial up texture depth. 6) Seal professionally: 1–2 coats impregnator for deep protection, then 2 coats polyurethane sealer for a film-forming, waterproof finish—respect cure times and ventilate. Example detail: Shower niche—wrap each return in one pass to avoid stop marks; pre‑cut mesh in corners for reinforcement. Case study—compact ensuite: a 4 m² shower zone finished in two days of coating plus sealing, zero grout lines, and waterproof microcement holding up under daily use thanks to correct polyurethane sealer cure.
Layer schedule—quick reference
Base/leveller | 0.5–1.0 mm | 3–6 h | Flatten highs; don’t chase perfection
Coat 1 | 0.5–0.8 mm | 3–6 h | Keep wet edge; avoid ridges
Coat 2 | 0.3–0.7 mm | 3–6 h | Tighten pattern; minimal water
Sealer(s) | Film-forming | As per product | Ventilate well; dust-free
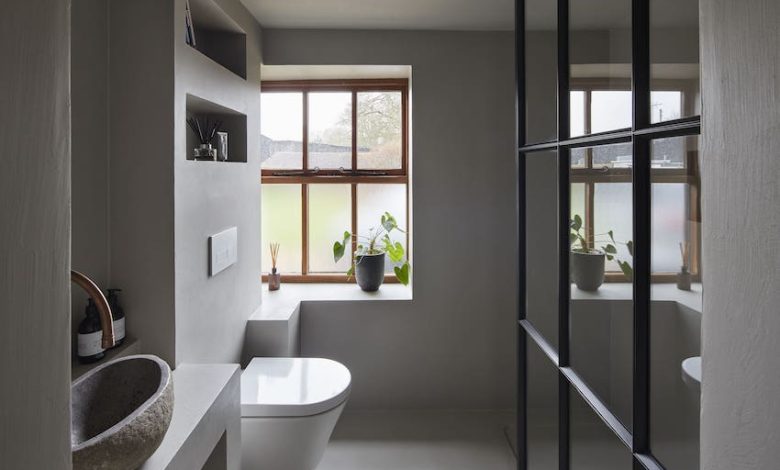
Microcement Bathroom Design Ideas: Colours, Textures and Anti‑Slip Options
Colour direction matters if the goal is a bathroom that looks sharp and actually behaves in wet zones. Lean into warm greys, earthy beiges and deep charcoals for depth without shouting; save the gallery white for hallways. In heavy‑use showers, avoid pure whites—they telegraph every watermark and grout‑line ghost. For texture, decide how much character is welcome: smooth satin reads clean and modern; lightly burnished brings hand‑made energy. State it in the spec: “subtle trowel marks, visible at 1–2 metres, no heavy swirls.” On floors, build safety in: add fine aggregate to the final coat and seal; aim for Pendulum Test Value (PTV) ≥36 wet so it stays sure‑footed when soapy. Keep details disciplined: use concealed metal trims, introduce crisp shadow gaps at floors, and run silicone at changes of plane for stress‑free movement. For lighting, let wall‑washers skim surfaces to celebrate the microcement grain, and skip harsh grazing beams that exaggerate every ripple on less‑than‑perfect substrates.
- Quick palette guide (with application hints):
- Clay Neutral (RAL 1019) — Warm spa vibe; best on walls and vanity faces for a cocooning feel.
- Soft Graphite (NCS S 6500‑N) — Clean, contemporary tone; ideal for floors and showers to anchor the scheme.
- Mineral Greige (custom tint) — Calm, hotel‑style serenity; use as a full room wrap to unify planes.
- Specification snapshot:
- Texture: smooth satin or lightly burnished; limit trowel marks to low‑contrast, directional strokes.
- Anti‑slip: fine silica aggregate in final microcement coat; verify PTV ≥36 wet after sealing.
- Junctions: concealed trims, 6–10 mm shadow gaps at floor perimeters, colour‑matched sanitary‑grade silicone at all plane changes.
- Lighting: wall‑wash downlights or linear grazers set off‑axis; keep direct skim‑grazing away from imperfect walls.
- Mood note: Pair Soft Graphite floor with matte black brassware; choose a satin sealer to minimise water spotting and keep maintenance quick.
Costs, Timeline and Finding a Microcement Installer You Trust
UK microcement costs aren’t smoke and mirrors—here’s the honest range that most solid trades quote, and what a realistic bathroom programme looks like. For a typical project, plan 4–7 days on site for substrate prep, layers and sealing, plus 5–7 days cure before heavy use or steaming hot showers. Want a clean hire process? Do this: measure m² per zone and add a 10% contingency; request itemised quotes covering prep, tanking, base/finish coats, sealants, trims and protection; ask for the system warranty (manufacturer-backed) and a recent installer portfolio; confirm programme windows; and put snag/return-visit terms in writing. Below are UK-oriented figures most London and regional specialists will recognise, plus a quick comparison against tiles so decisions aren’t guesswork.
| Item | Typical UK range (installed) | Notes |
| Microcement walls | £80–£120 per m² | Includes base/finish coats and sealer; complex niches push top end. |
| Microcement floors | £90–£150 per m² | Levelness and UFH commissioning affect rate. |
| Prep / tanking | £20–£50 per m² | Includes moisture barrier, mesh, primers; shower zones cost more. |
| Trims / accessories | £8–£25 per linear m | Aluminium or stainless edging, colour-matched where possible. |
| Finish | Installed cost (UK) | Programme | Joints/Grout | Maintenance | Typical Use |
| Microcement (bathroom) | £80–£150 per m² | 4–7 days install + 5–7 days cure | Seamless surface, no grout lines | Neutral cleaners; reseal every 2–4 years | Walls, floors, shower enclosures (with tanking) |
| Porcelain tiles | £60–£120 per m² (tile + labour) | 3–6 days install; immediate use after grout cures | Grout lines; periodic re-grout/seal | Mild acid-safe cleaners; grout maintenance | Walls, floors; great for heavy wear |
| Natural stone tiles | £100–£200 per m² | 5–8 days; sealing mandatory | Grout lines; stone sealing | pH-neutral only; regular resealing | Premium bathrooms, feature walls |
Here’s a tiny, real-world scope that mirrors many city flats: 7 m² walls, 4 m² floor, full tanking in the shower. Expect roughly £1,900–£3,100 plus VAT, driven by substrate condition and detailing. Programme-wise, block out one week for application and one more for curing before full-on use. When sending enquiries, keep it crystal: “Hi, I’m planning a microcement shower (4 m² walls) and floor (4 m²). Substrates: cement board + screed with UFH. Please quote for prep, tanking, application, sealing, and lead time.” Lock the date, confirm warranty, ask for maintenance guidance, and insist on a written snag schedule with a return visit if needed. This is how budgets stay intact and finishes stay crisp.
Cleaning, Maintenance and Fixes for Microcement Bathrooms
Microcement bathroom upkeep should be unapologetically simple: stay preventative, treat it gently, and keep the protective layers doing the heavy lifting. Daily and weekly, a quick wipe with a pH‑neutral cleaner and a fast swipe of a squeegee on shower walls stops mineral haze before it bites. Monthly, glance over silicone joints and edges and, if your installer used it, top up a protective wax with thin coats. Once a year, test water beading; if droplets flatten, it’s time to re‑seal high‑wear zones. Rules that save headaches: no bleach, no strong acids, no dragging metal; use furniture pads, choose bathmats with a breathable backing, and keep grit off floors. Hard‑water territory? Add a post‑shower squeegee routine plus a weekly pass with a non‑acid limescale remover to stop spotting before it scars.
Quick fixes for microcement are fast, clean, and localised. A light scratch? Denib with 800–1200‑grit paper and re‑seal the patch. A stubborn stain? Clean, lightly abrade, then apply sealer boundary‑to‑boundary for an invisible blend. A tiny chip on an edge? Use colour‑matched filler, float a micro‑fine coat, then re‑seal. Keep the same brand system for sealers and wax so chemistry stays predictable and the finish remains waterproof, stain‑resistant, and easy to live with.
| Task | Frequency | Product tip | Real‑world example | Why it matters |
| Neutral clean | Weekly | pH 7 cleaner; microfibre cloth | ECOVER pH‑neutral spray + soft cloth on vanity and walls | Protects sealer integrity; avoids dulling |
| Limescale spot | As needed | Mild, non‑acid remover; rinse well | HG Limescale Remover Foam (non‑acid) on taps and shower glass; rinse | Prevents mineral staining without etching |
| Reseal high‑use shower | 12–18 months | Same brand sealer | Top up with the original polyurethane sealer used at install | Restores water beading and stain resistance |
| Floor wax (optional) | 3–6 months | Thin coats; buff lightly | One ultra‑thin coat of compatible maintenance wax; soft pad buff | Adds sheen and a sacrificial wear layer |